Encrypted Void Linux Install on my ThinkPad X1 Carbon
Posted by Dave Eddy on Sep 05 2018 - tags: techI purchased the ThinkPad X1 Carbon (6th Gen) laptop about a month ago and have been loving it. My friend Mike convinced me to get it after showing me how nice his was and how well Linux ran on it. I hadn’t run Linux on a laptop or a desktop since around 2010, as I had switched over to almost exclusively OS X.
I installed Manjaro when I got the laptop and used it for a couple of weeks just to get used to Linux again (and the i3 Window Manager). However, this was also my first experience with systemd, and, after using it for a bit, I really wanted something a whole lot simpler. Something that was designed to be lean, easy to understand, and easy to manage.
Enter Void Linux.
 </img>
To install Void Linux, I basically copied the steps in this wiki page:
https://wiki.voidlinux.eu/Manual_install_w/full_disk_encryption
with the modifications at the bottom for EFI/UEFI machines.
BIOS Modifications
The first thing I did was make some BIOS modifications based on the Arch Wiki page for this model laptop:
https://wiki.archlinux.org/index.php/Lenovo_ThinkPad_X1Carbon(Gen_6)
Even though I’m not installing Arch, the BIOS modifications here are universal to any distro of Linux installed.
Thunderbolt BIOS Assist Mode
Config -> Thunderbolt BIOS Assist Mode - Set to "Enabled". When disabled, on Linux, power usage appears to be significantly higher because of a substantial number of CPU wakeups during s2idle.
I honestly don’t know much about this, but I really don’t use any Thunderbolt peripherals, so I don’t really care what this is set to.
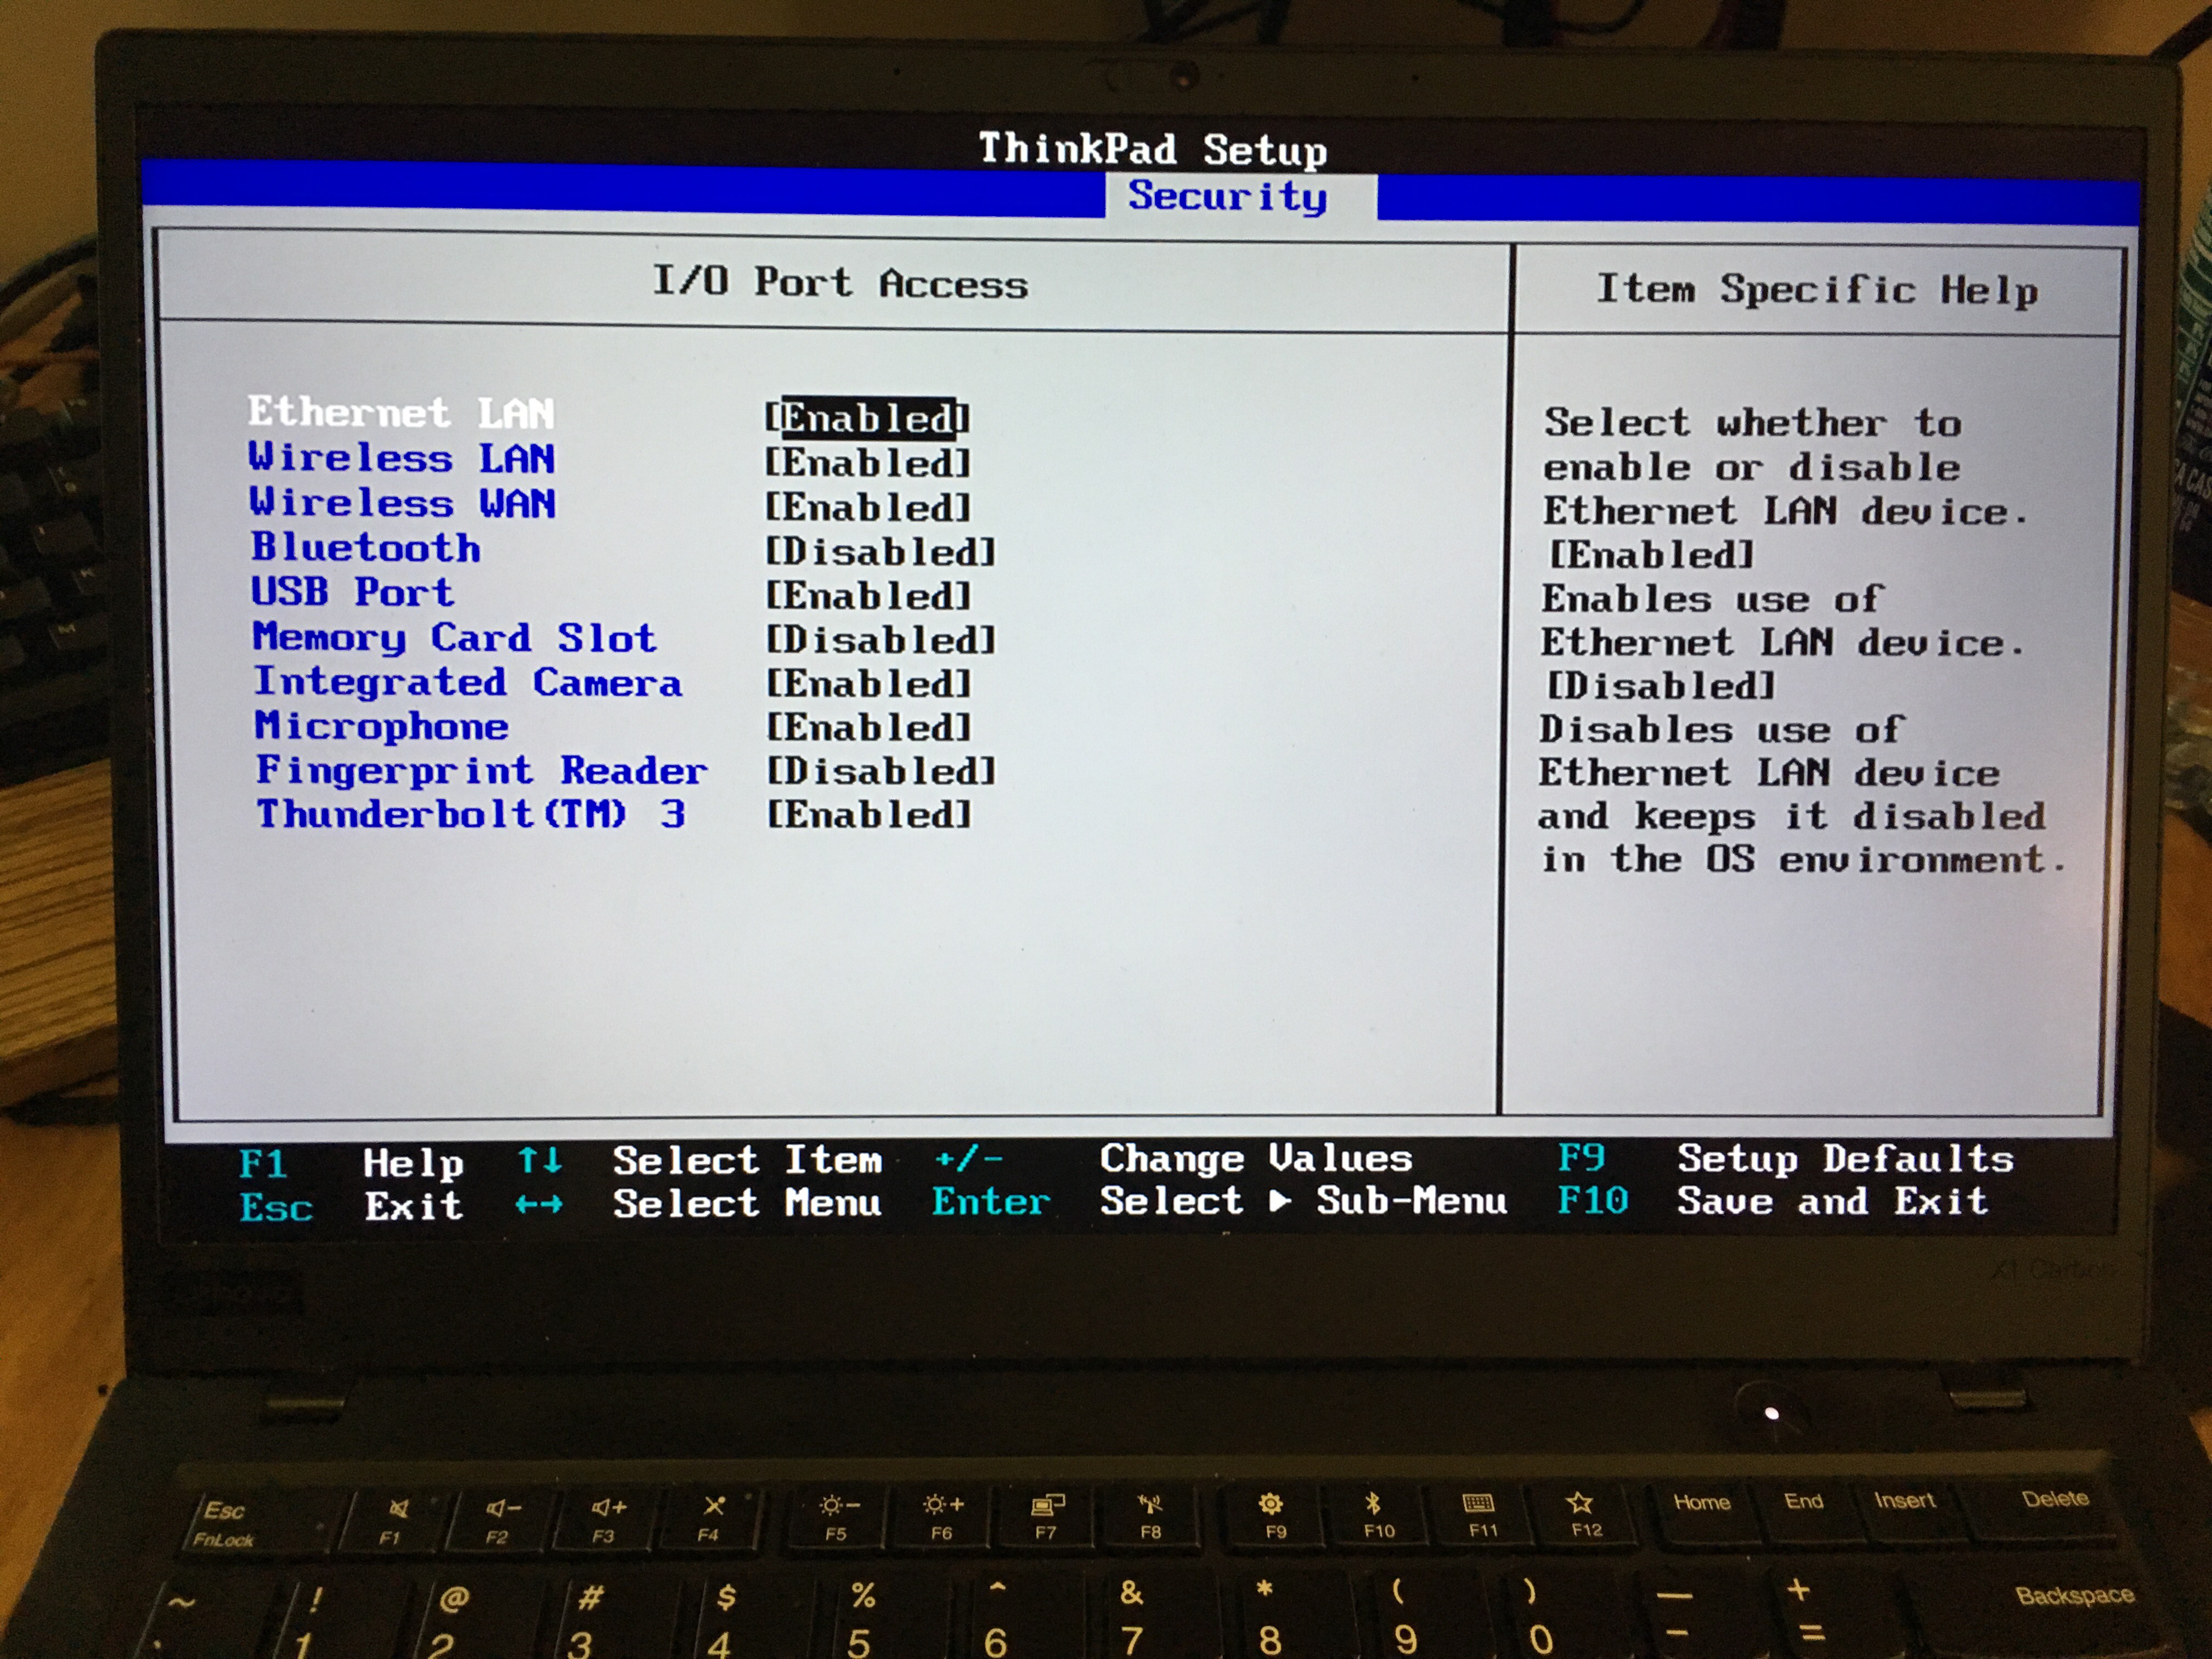
Disable Certain I/O Ports
 </img>
I chose to disable things I wouldn’t be using, such as:
- Bluetooth
- Memory Card Slot
- Fingerprint Reader
Boot Void Linux USB
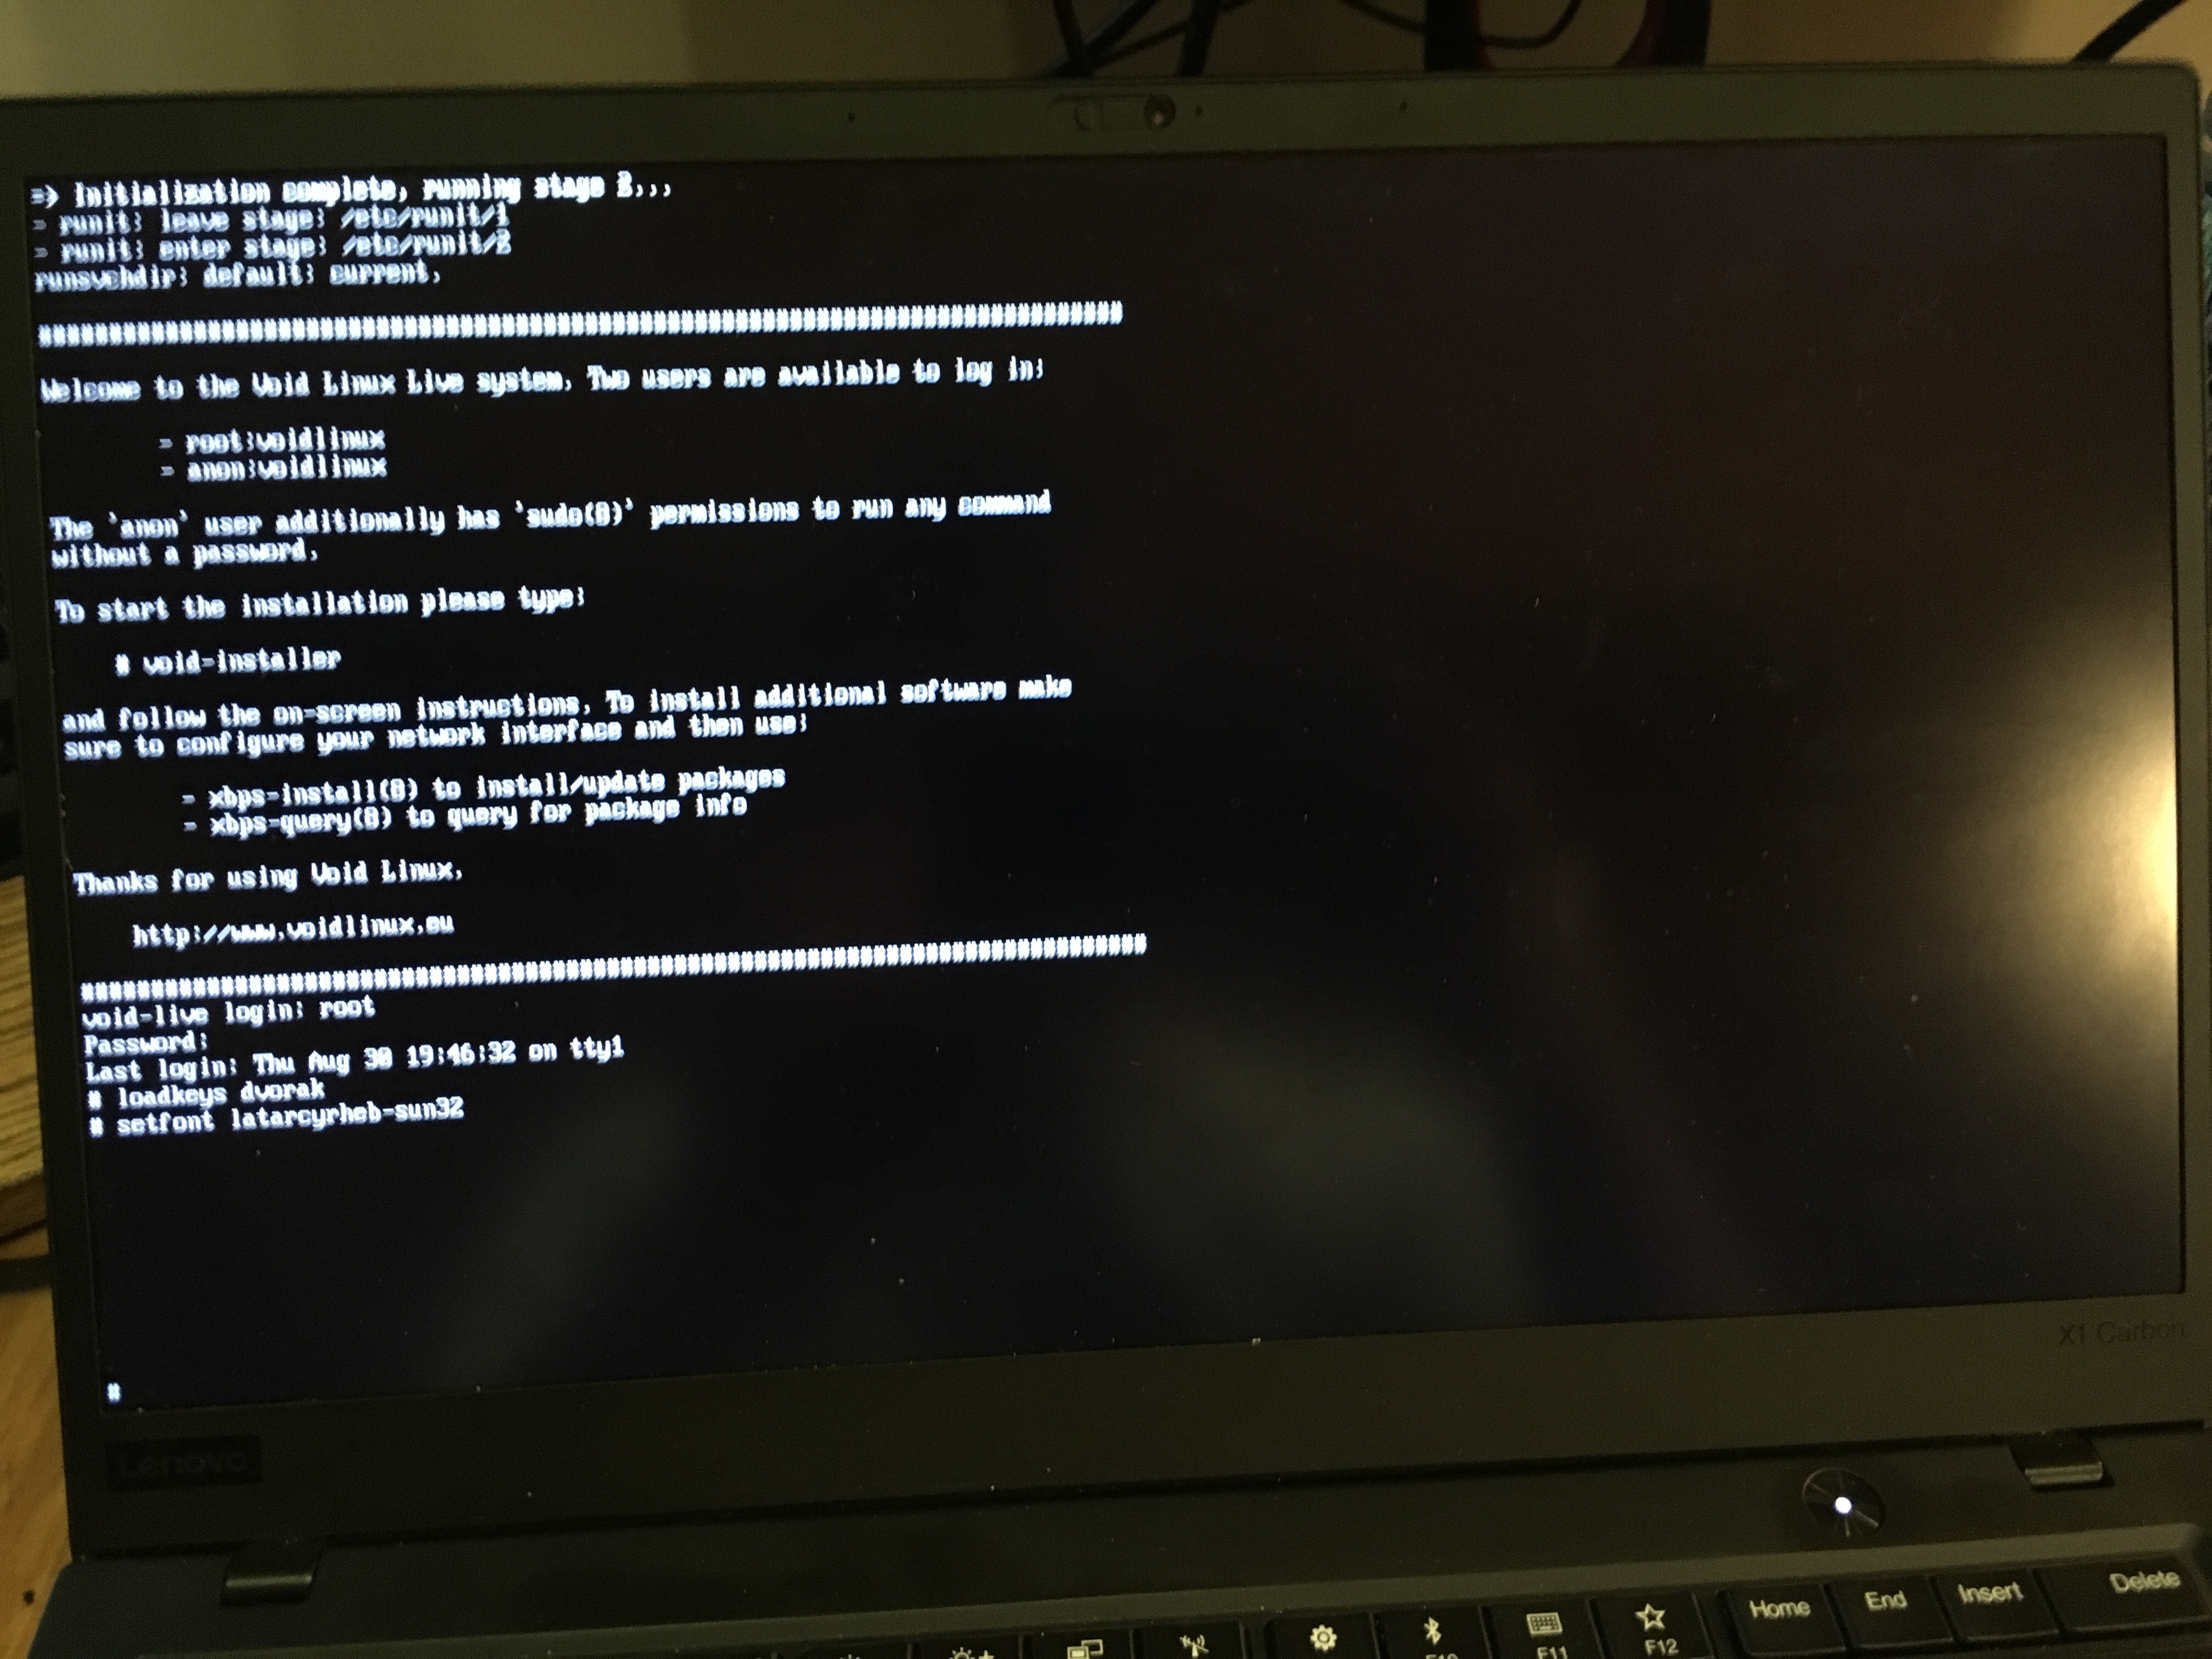
I put a freshly copied USB stick of the latest musl Void Linux release into my laptop, rebooted, and pressed “Enter” when it was booting to bring up the one-time boot menu to boot from the USB drive.
 </img>
The machine booted, but the font was almost impossible to read. The first
thing I did (even though I couldn’t really read the font) was login (using
void/void) and load the Dvorak Keyboard
Layout as well as set
a bigger font.
# loadkeys dvorak
# setfont latarcyrheb-sun32
 </img>
Now that’s much nicer to read (the picture is blurry because of my camera, not the font). To get a list of all possible fonts I used:
# ls /usr/share/kbd/consolefonts/
161.cp.gz
...
I saw that a lot of the fonts seemed to have their font size as part of the name, so I searched for a relatively large number to find a suitably large font.
# ls /usr/share/kbd/consolefonts/ | grep 32
latarcyrheb-sun32.psfu.gz
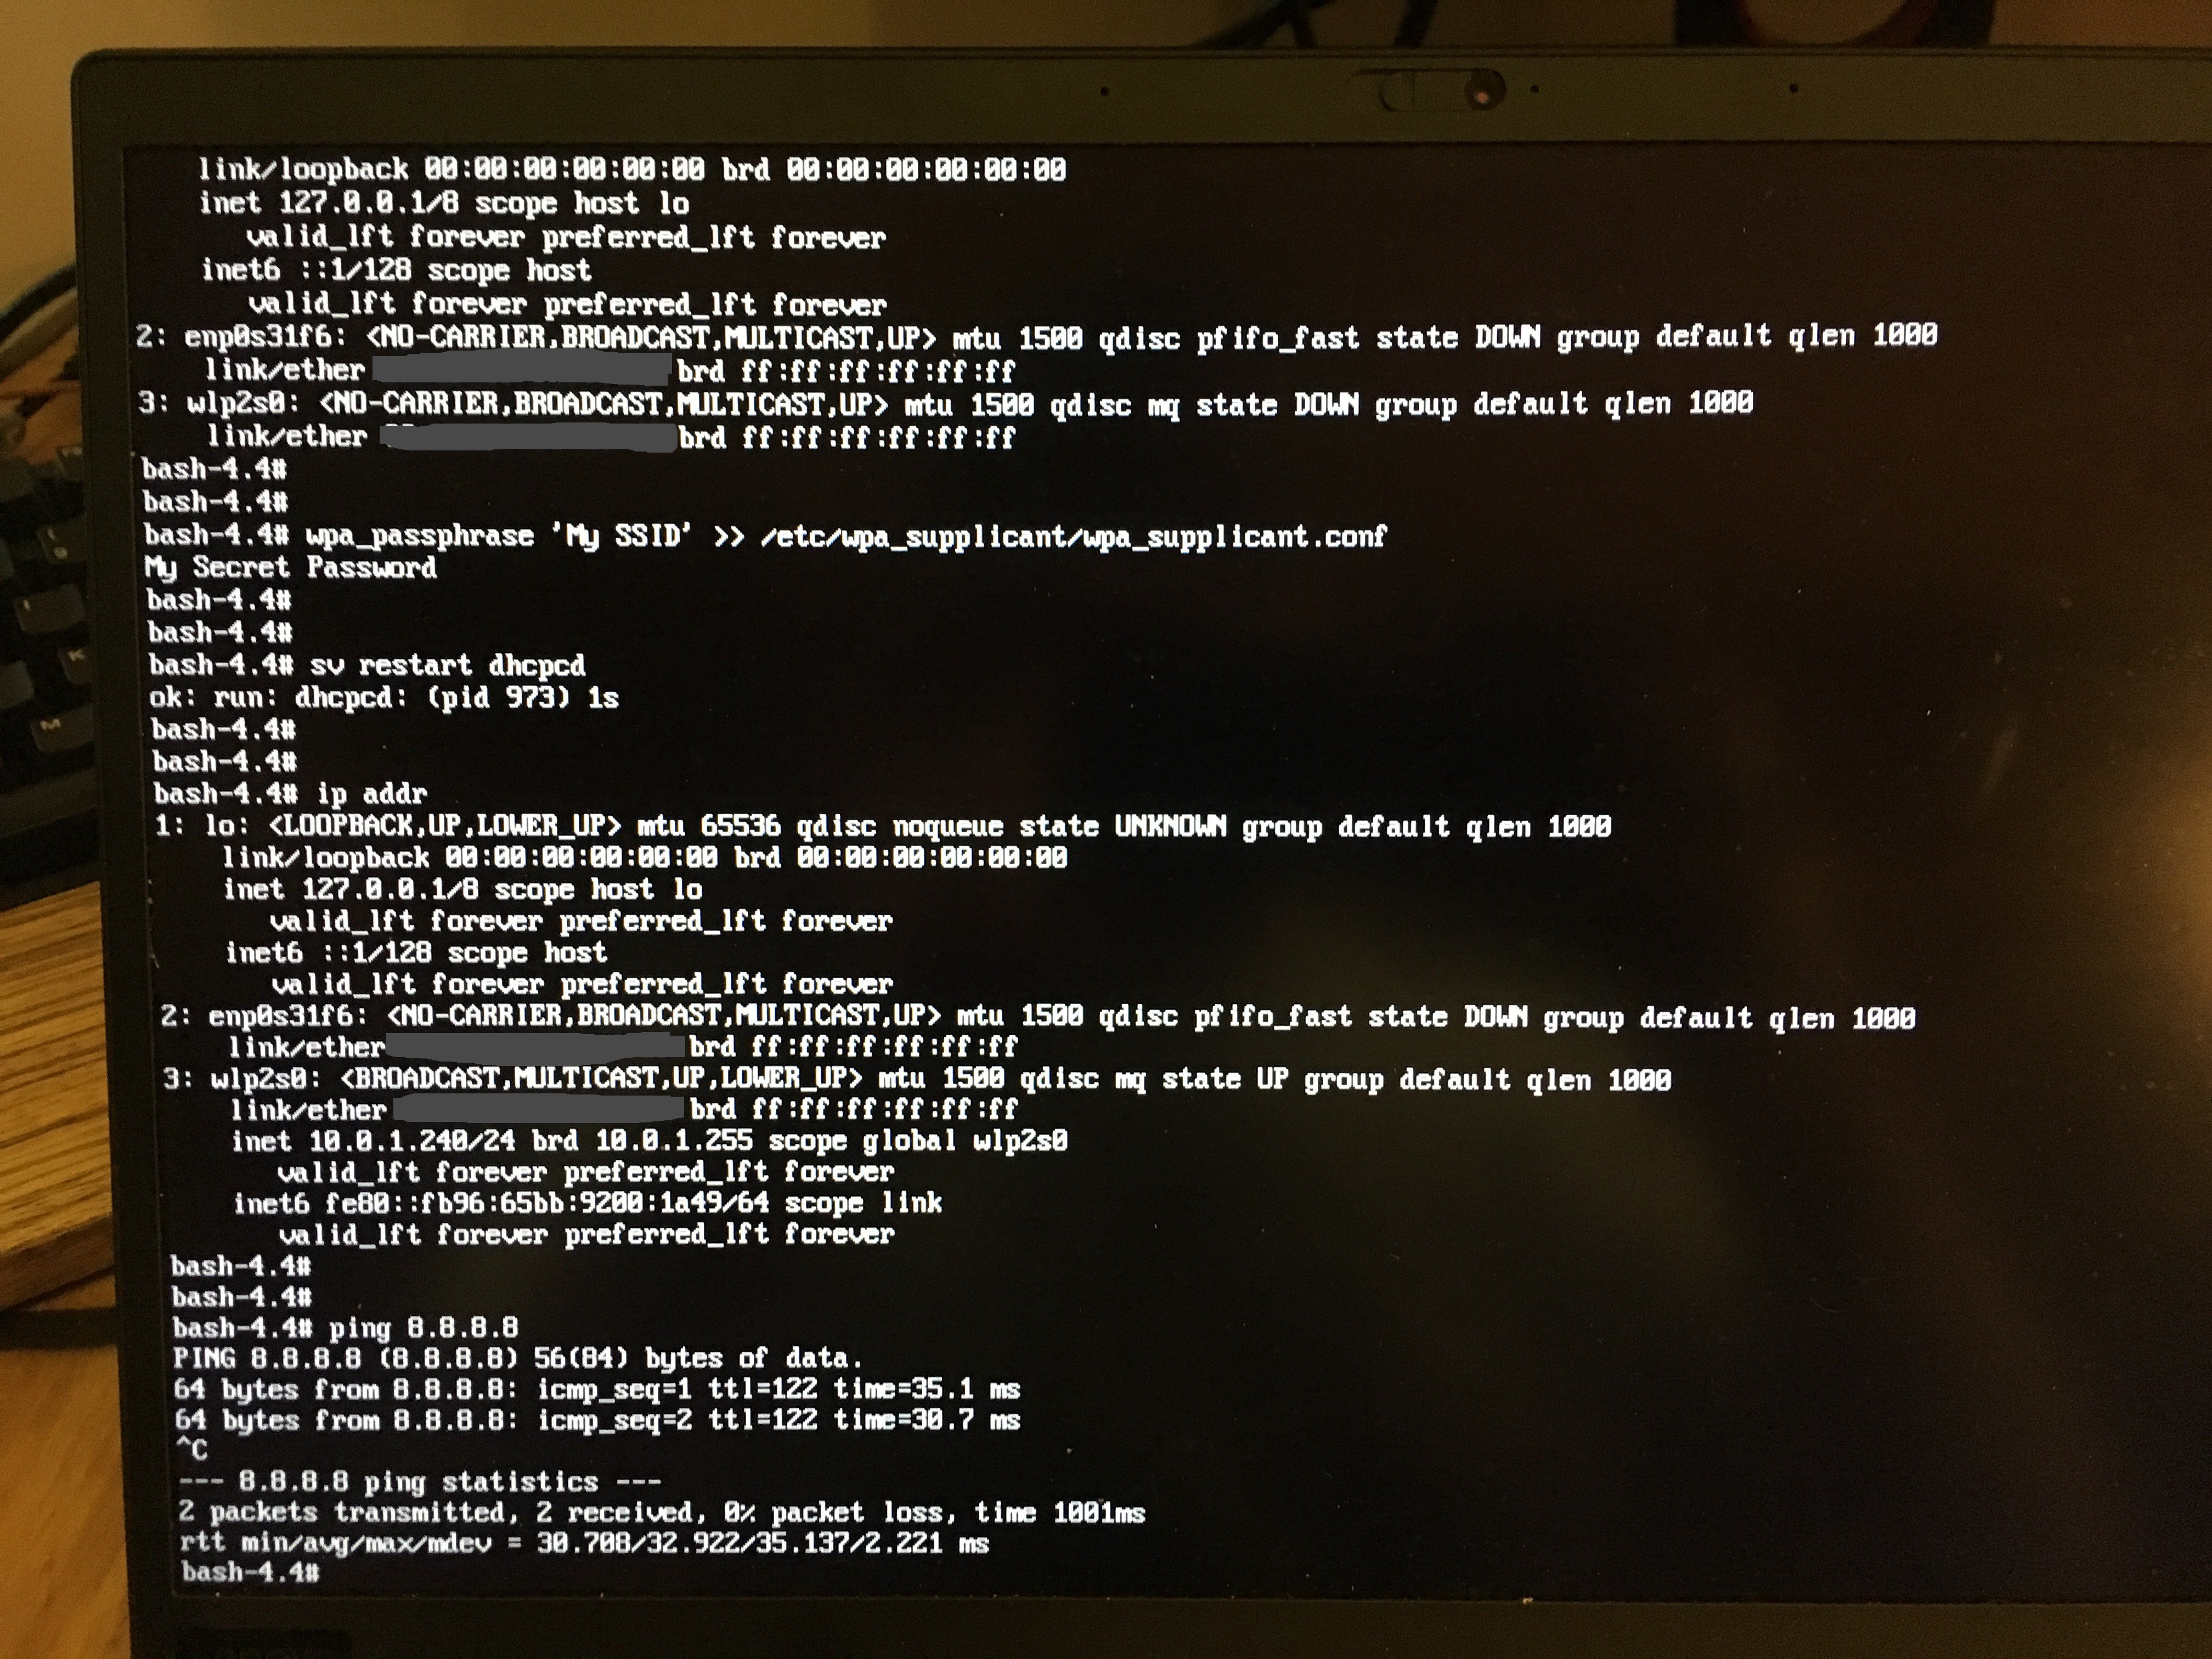
Setup WiFi
There is no built-in ethernet port on this laptop so I chose to do the installation over WiFi. I have a USB to ethernet adapter but decided that I should familiarize myself with setting up the WiFi for my own benefit, as well as to make sure that it all worked as expected out of the box.
 </img>
The setup process is insanely easy and straight-forward:
# wpa_passphrase 'My SSID' >> /etc/wpa_supplicant/wpa_supplicant.conf
My Secret Password<enter>
# sv restart dhcpcd
It took a small amount of time (10 seconds maybe) for the network to come up. I
verified with ip addr that the interface had a valid IP address, and then
pinged 8.8.8.8 to ensure that the internet was working.
Format and Encrypt the Hard Drive
This next part basically mirrors this Void Linux WiKi Page
The FIRST thing I did was run bash so I could have a shell that I was used
to. Luckily, Void comes with bash preinstalled.
I then used cfdisk to format the hard drive as you see below. 500M EFI
partition, and the rest as a generic Linux filesystem (will be cut up below and
encrypted).
# bash
# fdisk -l /dev/nvme0n1
Disk /dev/nvme0n1: 238.5 GiB, 256060514304 bytes, 500118192 sectors
Units: sectors of 1 * 512 = 512 bytes
Sector size (logical/physical): 512 bytes / 512 bytes
I/O size (minimum/optimal): 512 bytes / 512 bytes
Disklabel type: gpt
Disk identifier: F35AA337-CF94-4EC2-8165-CF2719368B16

Device           Start       End   Sectors  Size Type
/dev/nvme0n1p1    2048   1026047   1024000  500M EFI System
/dev/nvme0n1p2 1026048 500118158 499092111  238G Linux filesystem
This configures the encrypted volume and sets the master password for it:
# cryptsetup luksFormat /dev/nvme0n1p2

WARNING!
========
This will overwrite data on /dev/nvme0n1p2 irrevocably.

Are you sure? (Type uppercase yes): YES
Enter passphrase:
Verify passphrase:
I opened the encrypted device as voidlinux with the password created above:
# cryptsetup luksOpen /dev/nvme0n1p2 voidlinux
Enter passphrase for /dev/nvme0n1p2:
Next I created the LVM volume group and then 2 logical volumes: The first 2G
partition for swap space and the rest for all of /. I opted to not have a
separate home partition.
# vgcreate voidlinux /dev/mapper/voidlinux
  Physical volume "/dev/mapper/voidlinux" successfully created.
  Volume group "voidlinux" successfully created
# lvcreate --name swap -L 2G voidlinux
  Logical volume "swap" created.
# lvcreate --name root -l 100%FREE voidlinux
  Logical volume "root" created.
Then, I created various filesystems:
# mkfs.vfat /dev/nvme0n1p1
...
# mkfs.xfs -L root /dev/voidlinux/root
...
# mkswap /dev/voidlinux/swap
...
Finally, I mounted the devices:
# mount /dev/voidlinux/root /mnt
# mkdir -p /mnt/boot/efi
# mount /dev/nvme0n1p1 /mnt/boot/efi
# cd /mnt
# for d in dev proc sys; do mkdir "$d"; mount --rbind "/$d" "$d"; done
At this point the disk was encrypted and mounted in /mnt, ready for the
operating system to be installed.
Install Void using xbps
I ran the following commands to install the necessary base packages into /mnt:
# export XBPS_ARCH=x86_64-musl
# xbps-install -S -R https://repo.voidlinux.eu/current/musl -r /mnt base-system lvm2 cryptsetup grub-x86_64-efi
[*] Updating `https://repo.voidlinux.eu/current/musl/x86_64-musl-repodata' ...
x86_64-musl-repodata: 1618KB [avg rate: 1318KB/s]
...
Then, I chroot‘d into the directory to finish up the setup:
# chroot /mnt
# chown root:root /
# chmod 755 /
# passwd root
New password:
Retype new password:
passwd: password updated successfully
# echo temple > /etc/hostname
Modified /etc/fstab to look like:
#
# See fstab(5).
#
# <file system>	<dir>	<type>	<options>		<dump>	<pass>

tmpfs                   /tmp        tmpfs   defaults,nosuid,nodev   0   0
/dev/voidlinux/root     /           xfs     defaults                0   0
/dev/nvme0n1p1          /boot/efi   vfat    defaults                0	0
/dev/voidlinux/swap     swap        swap    defaults                0   0
Used this command to grab the UUID of the crypto_LUKS device:
# lsblk -f
NAME               FSTYPE          LABEL     UUID                                   MOUNTPOINT
loop0              squashfs
loop1              ext3                      cb8225d9-ed09-4640-9354-93a35a3b2a84
├─live-rw          ext3                      cb8225d9-ed09-4640-9354-93a35a3b2a84
└─live-base        ext3                      cb8225d9-ed09-4640-9354-93a35a3b2a84
loop2              DM_snapshot_cow
└─live-rw          ext3                      cb8225d9-ed09-4640-9354-93a35a3b2a84
sda                iso9660         VOID_LIVE 2017-10-07-21-26-02-00
├─sda1             iso9660         VOID_LIVE 2017-10-07-21-26-02-00
└─sda2             vfat            grub_uefi 6477-ECC7
nvme0n1
├─nvme0n1p1        vfat                      85C5-B1A3
└─nvme0n1p2        crypto_LUKS               9cacb813-56eb-41ee-8b08-97fa2ef4d6a3
  └─voidlinux      LVM2_member               XatMT9-WLEF-2OCE-Zpfq-IzeR-iQrV-j2ebzw
    ├─voidlinux-swap
    │              swap                      545c4162-9f2b-4437-9a58-8a71810fbc12
    └─voidlinux-root
                   xfs             root      3e9bec50-646b-4ce4-916f-aad065a55a34   /
Note that the UUID here that we want is 9cacb813-56eb-41ee-8b08-97fa2ef4d6a3.
I modified /etc/default/grub to have these 2 line:
GRUB_CMDLINE_LINUX_DEFAULT="loglevel=4 slub_debug=P page_poison=1 acpi.ec_no_wakeup=1 rd.auto=1 cryptdevice=UUID=9cacb813-56eb-41ee-8b08-97fa2ef4d6a3:lvm"
GRUB_ENABLE_CRYPTODISK=y
acpi.ec_no_wakeup=1 is something from the Arch Wiki to enable a decent form of
sleep for this laptop.
I created a protected key file with:
# dd bs=512 count=4 if=/dev/urandom of=/boot/volume.key
4+0 records in
4+0 records out
2048 bytes (2.0 kB, 2.0 KiB) copied, 0.000140033 s, 14.6 MB/s
# cryptsetup luksAddKey /dev/nvme0n1p2 /boot/volume.key
Enter any existing passphrase:
# chmod 000 /boot/volume.key
# chmod -R g-rwx,o-rwx /boot
And added it to /etc/crypttab:
# cat /etc/crypttab
voidlinux /dev/nvme0n1p2 /boot/volume.key luks
Then added it to initramfs to these files would be used:
# cat /etc/dracut.conf.d/10-crypt.conf
install_items+=" /boot/volume.key /etc/crypttab "
Finally, I installed grub on the hard drive:
# grub-install /dev/nvme0n1
Installing for x86_64-efi platform.
File descriptor 4 (/dev/nvme0n1p1) leaked on vgs invocation. Parent PID 5346: grub-install
File descriptor 4 (/dev/nvme0n1p1) leaked on vgs invocation. Parent PID 5346: grub-install
Installation finished. No error reported.
And ran xbpm-reconfigure to finish things up:
# xbps-reconfigure -f linux4.17
linux4.17: configuring ...
Executing post-install kernel hook: 20-dracut ...
Executing post-install kernel hook: 50-efibootmgr ...
Executing post-install kernel hook: 50-grub ...
Generating grub configuration file ...
Found linux image: /boot/vmlinuz-4.17.19_1
Found initrd image: /boot/initramfs-4.17.19_1.img
grub-probe: error: cannot find a GRUB drive for /dev/sda1.  Check your device.map.
done
linux4.17: configured successfully.
Before rebooting however, I made a couple of small quality-of-life changes.
I set the default keymap to dvorak and the console font size to something readable.
# egrep '^(FONT|KEYMAP)=' /etc/rc.conf
KEYMAP="dvorak"
FONT="latarcyrheb-sun32"
I then exited out of the chroot (ctrl-D) and copied over the working
wpa_supplicant.conf I had so WiFi would start up easily on my new system:
cp /etc/wpa_supplicant/wpa_supplicant.conf /mnt/wpa_supplicant/wpa_supplicant.conf
And we are done! last but not least:
reboot
Initial setup
The first thing I had to do after logging in was ensure dhcpcd and sshd were
running. I actually don’t remember if this next step was necessary - if not it
will be a nop and do no harm:
xbps-install -S dhcpcd
And then to enable both services:
ln -s /etc/sv/sshd /var/service
ln -s /etc/sv/dhcpcd /var/service
Once that is all up and running, I ssh’d in for an easier setup.
I created a user account for myself:
# useradd -m -s /bin/bash -U -G wheel,users,audio,video,cdrom,input dave
# passwd dave
New password:
Retype new password:
passwd: password updated successfully
I logged out of the root account and logged in as the dave user just created.
Then, I installed xorg, i3 (actually i3-gaps), and some other basic stuff
I’d want:
sudo xbps-install -S xorg-minimal xorg-fonts xf86-video-intel
sudo xbps-install -S i3-gaps
sudo xbps-install -S git curl wget
Then, I cloned my dotfiles from GitHub and installed them so I’d feel right at home!
[dave@temple ~]$ mkdir dev
[dave@temple ~]$ cd dev/
[dave@temple dev]$ git clone git://github.com/bahamas10/dotfiles.git
Cloning into 'dotfiles'...
remote: Counting objects: 1210, done.
remote: Compressing objects: 100% (25/25), done.
remote: Total 1210 (delta 14), reused 23 (delta 9), pack-reused 1176
Receiving objects: 100% (1210/1210), 189.20 KiB | 909.00 KiB/s, done.
Resolving deltas: 100% (716/716), done.
[dave@temple dev]$ cd dotfiles/
[dave@temple dotfiles]$ ./install
With that, I only had a couple more steps to go. I setup startx to launch
i3:
$ echo 'exec i3 > .xinitrc'
And then aliased startx in ~/.bashrc.local to ensure that it would exit
after x finished. This way, no on can open up TTY with X running, ctrl-c it,
and have a prompt on my machine.
alias startx='startx; exit'
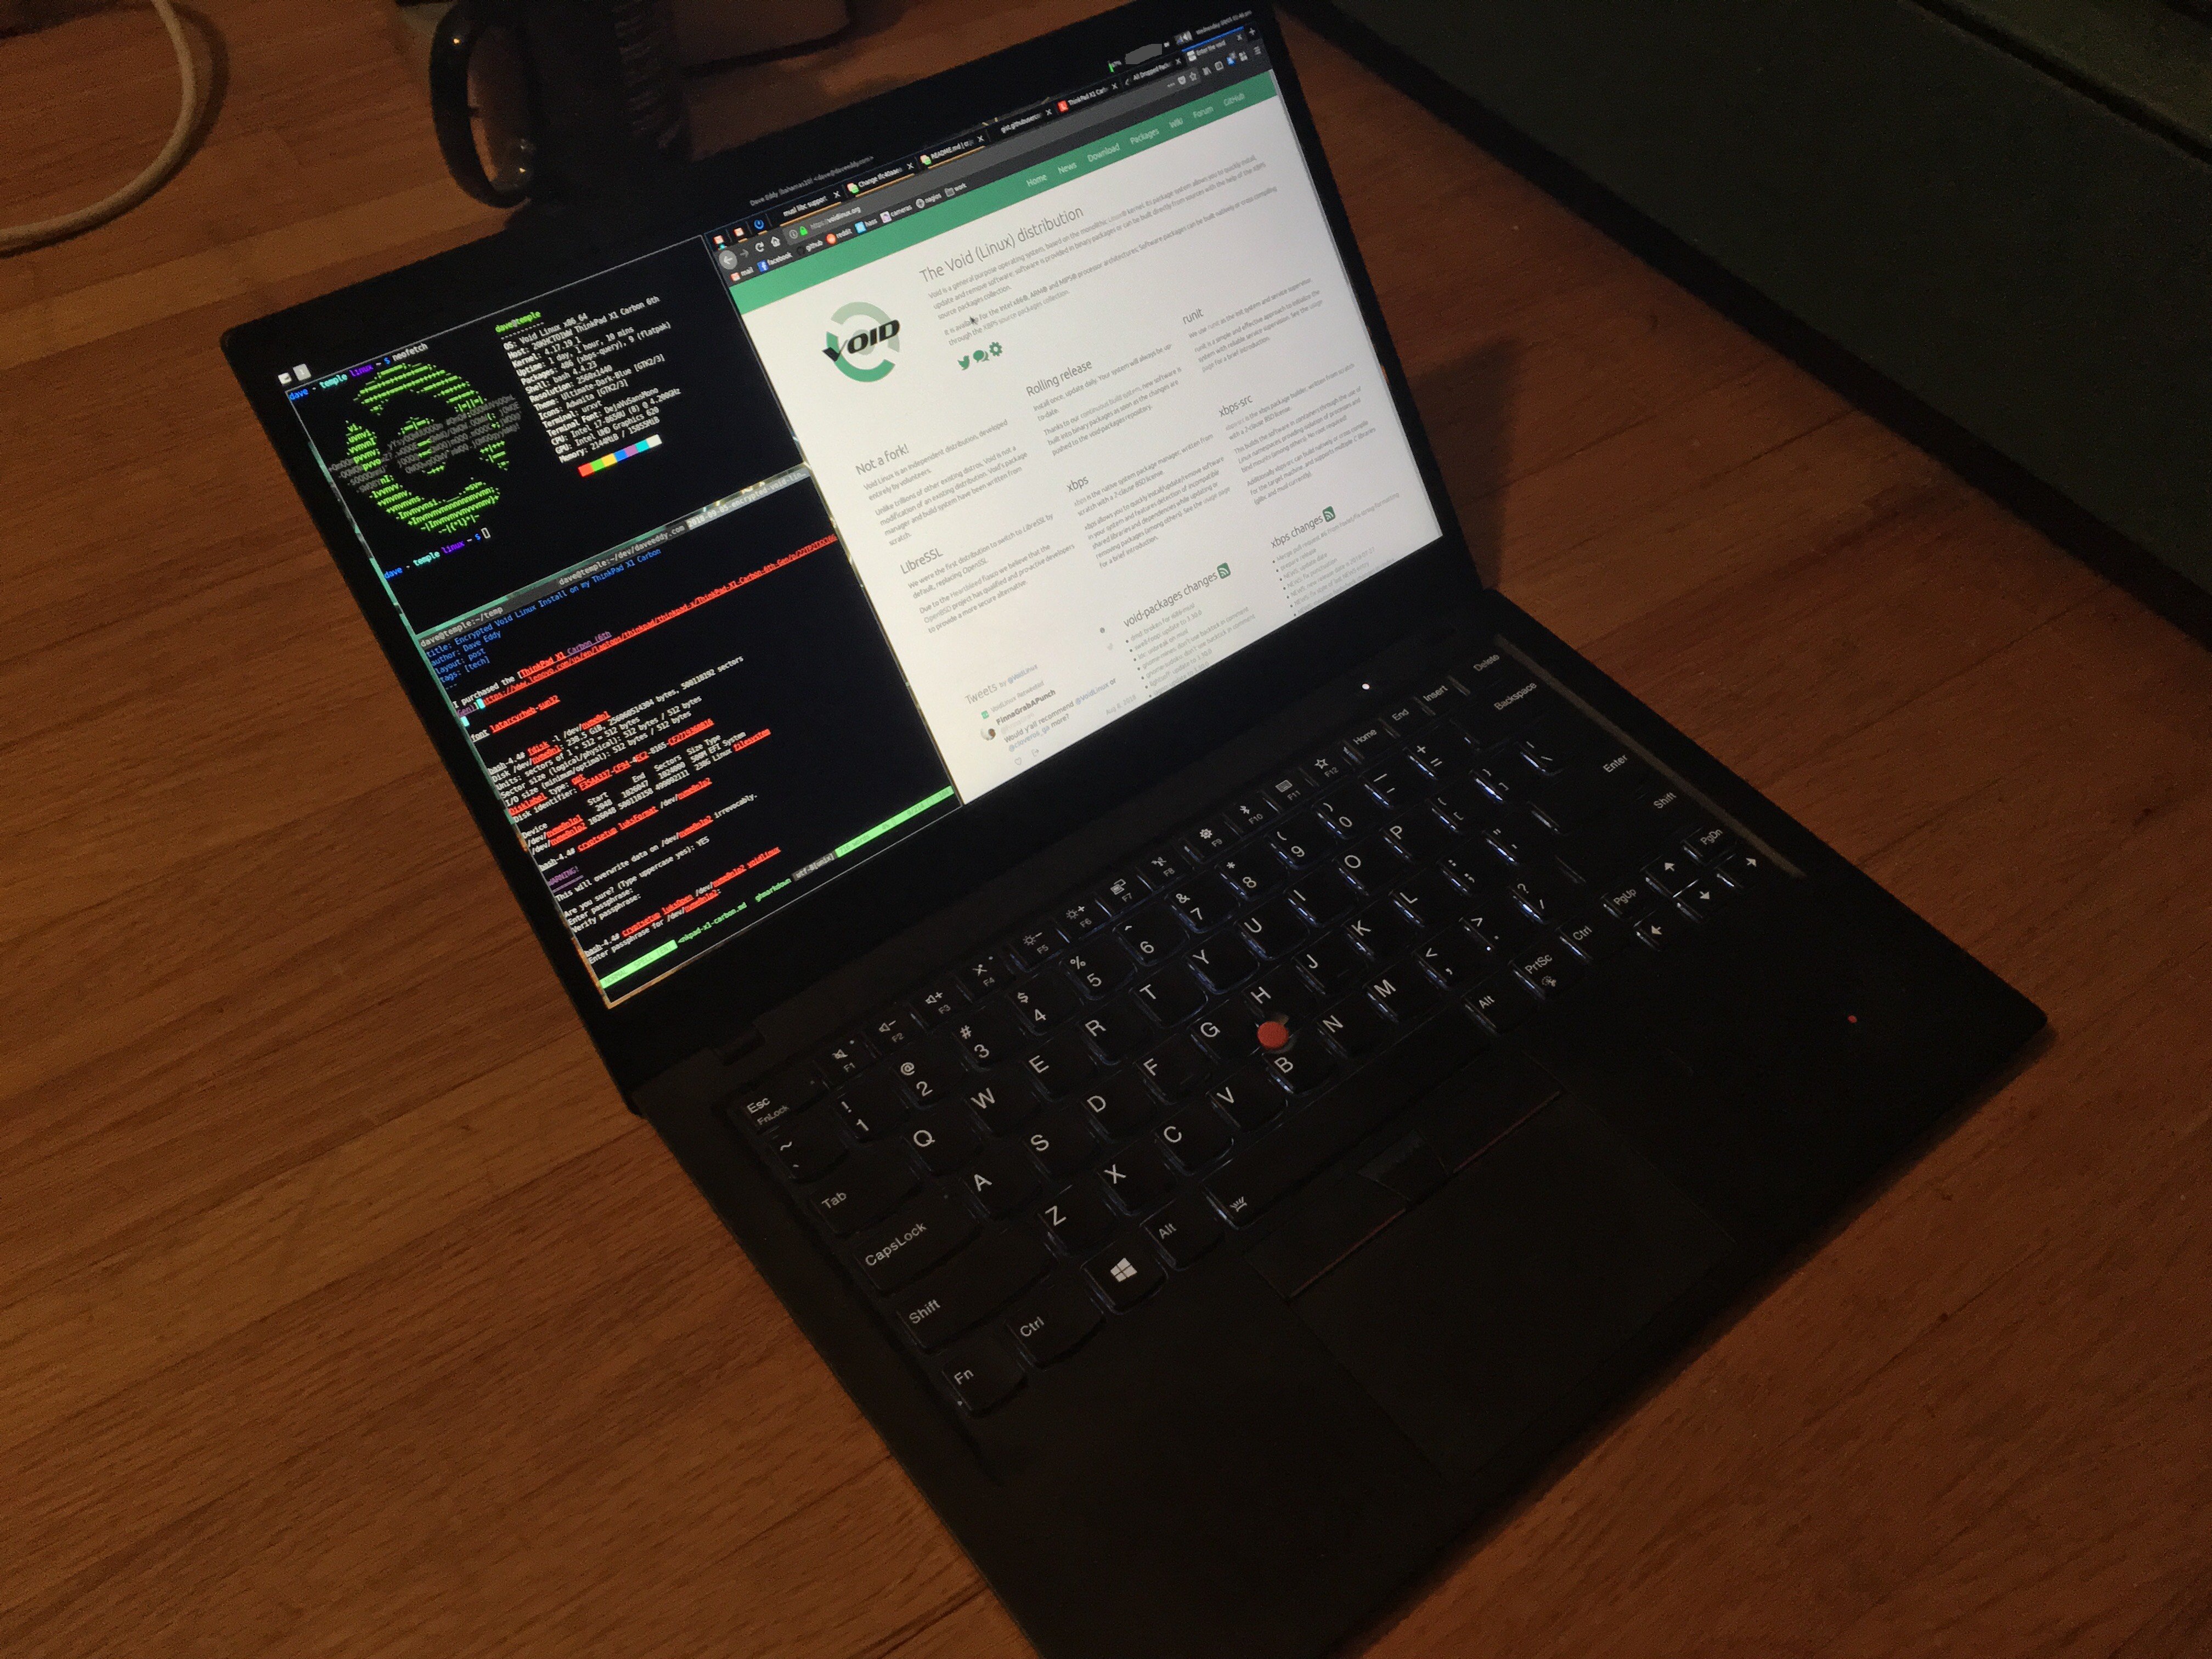
Glamour shots
I installed a lot of extra software like firefox as my browser, urxvt
(unicode-rxvt) as my terminal, neofetch to display that ASCII art and system
information, vim as my editor, xfce4-panel as my top panel, and scrot to
take the screenshot… just to name a few.
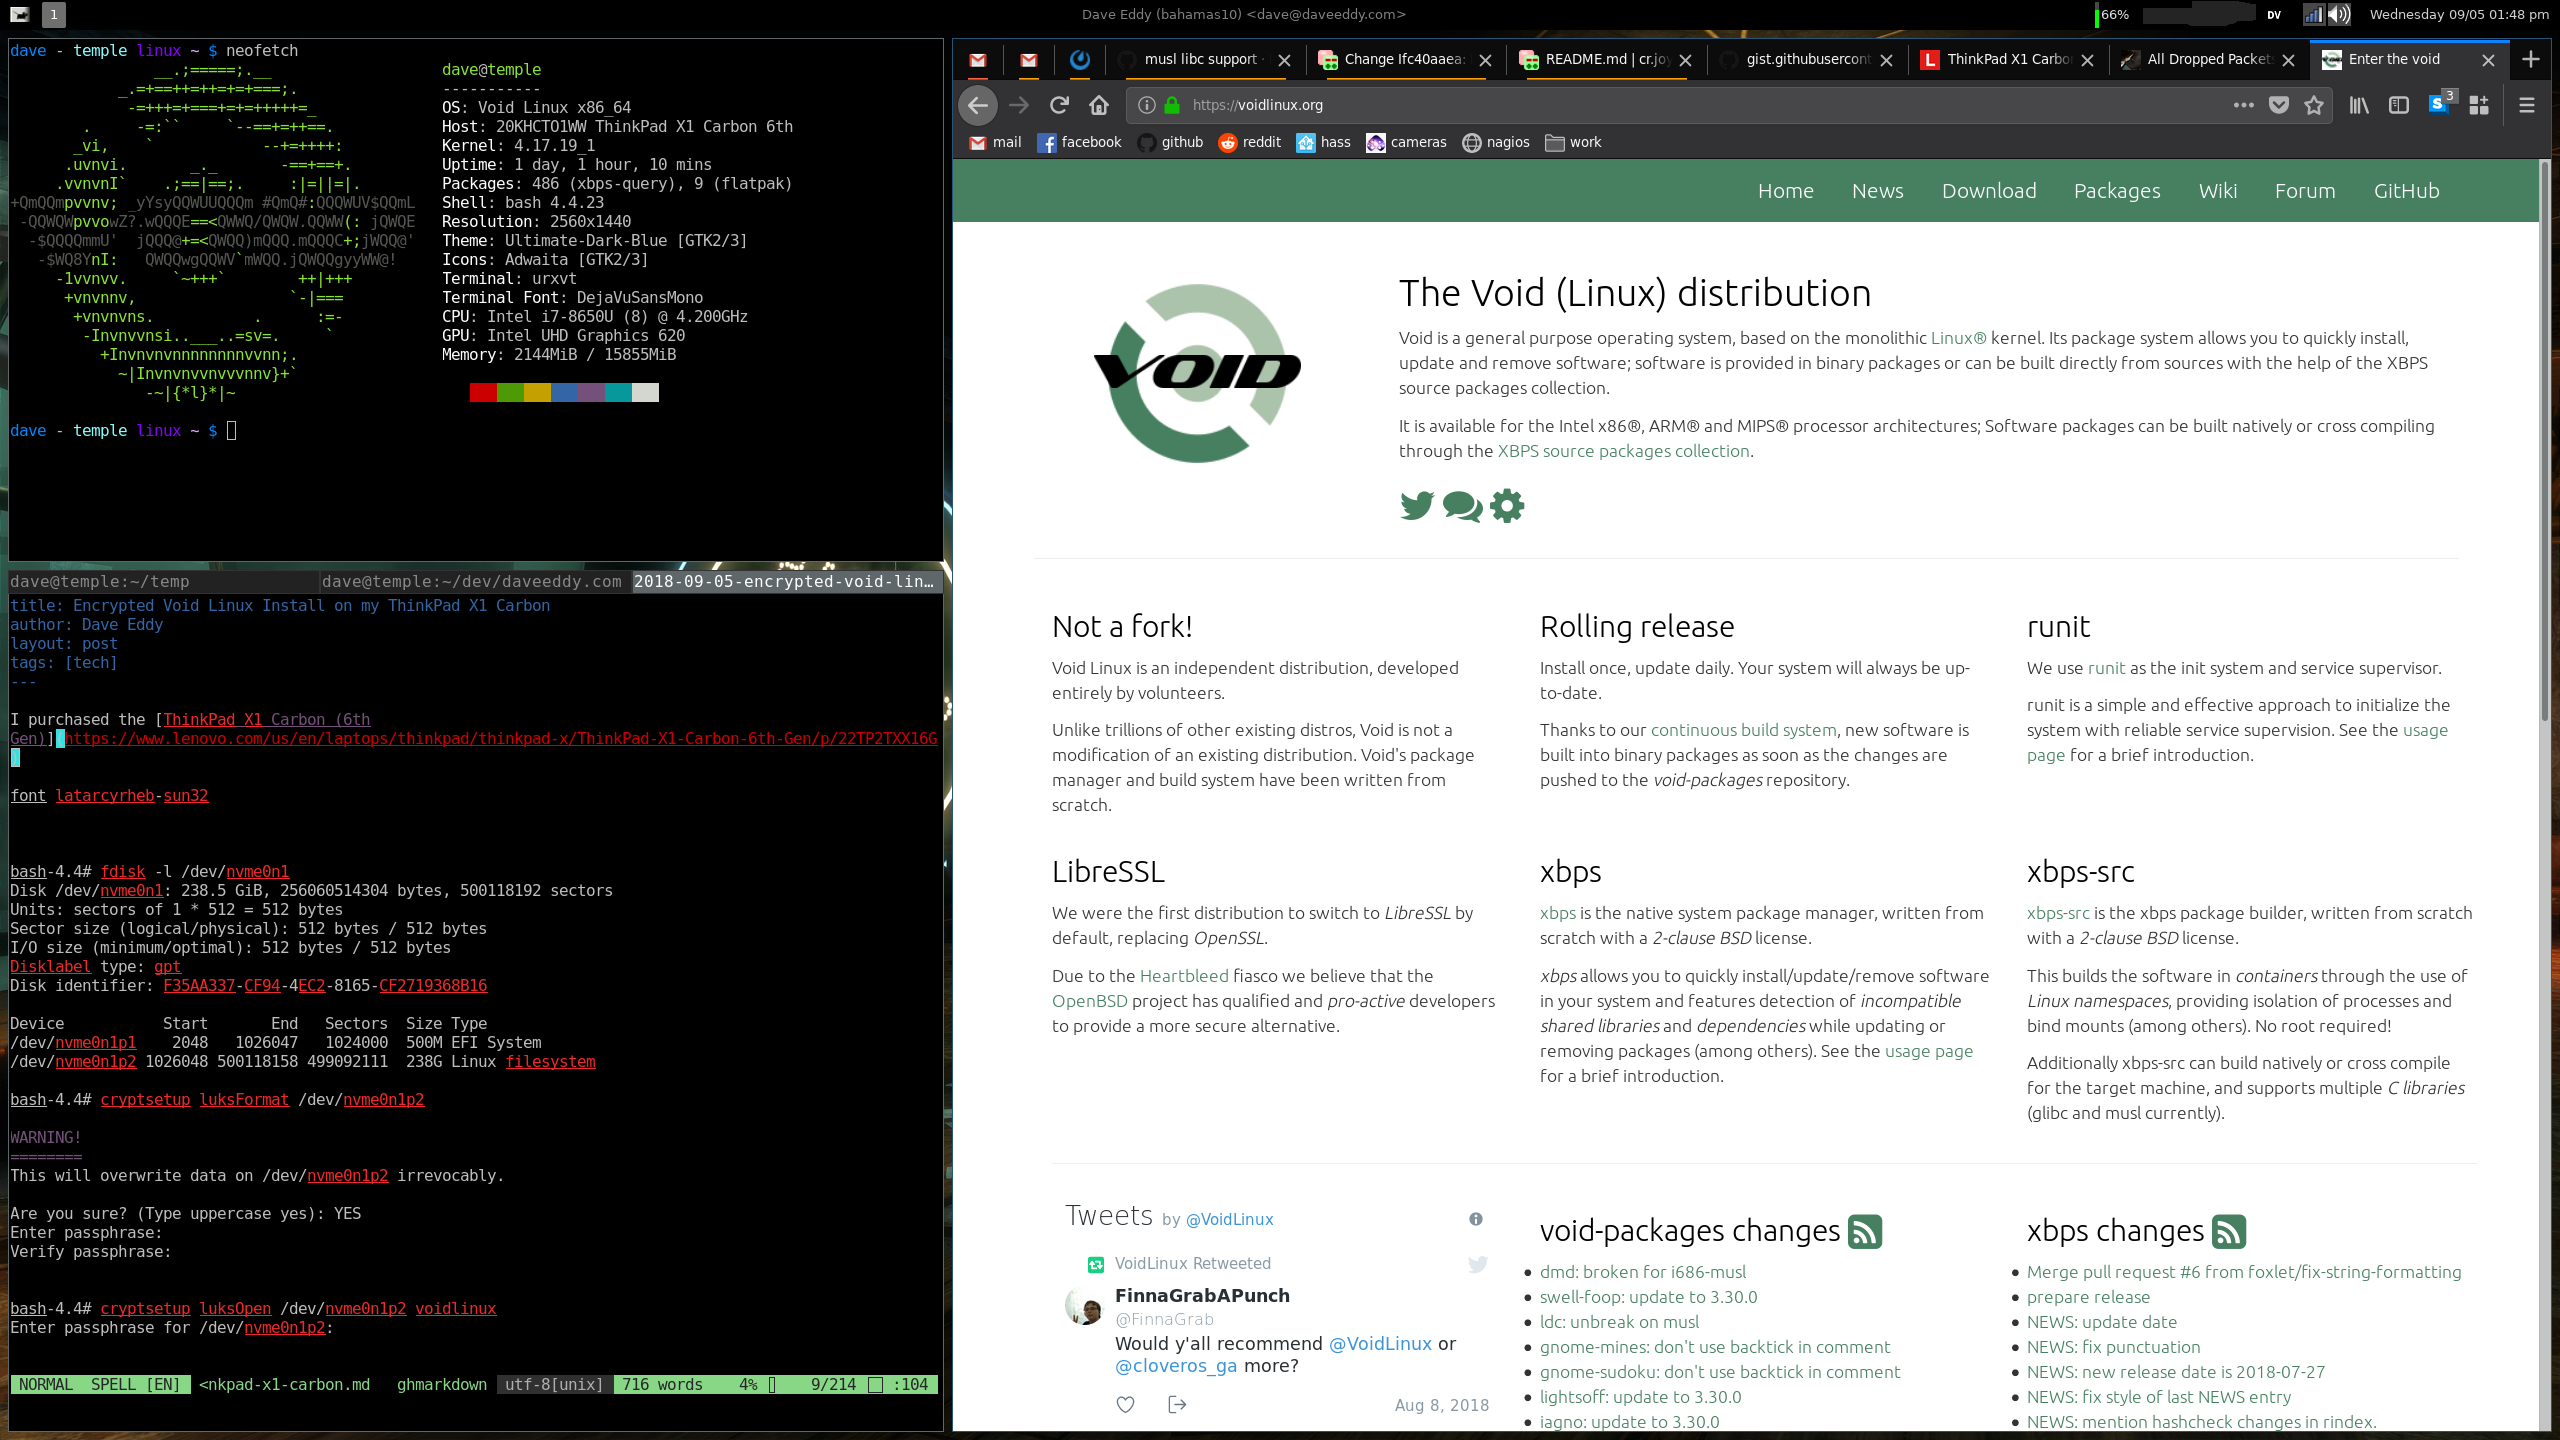
A lot of my favorite things on my laptop:
 </img>
Screenshot from the first picture:
 </img>