ThinkPad X1 Carbon Gen 6 BIOS Update

Posted by Dave Eddy on Sep 09 2018 - tags: tech

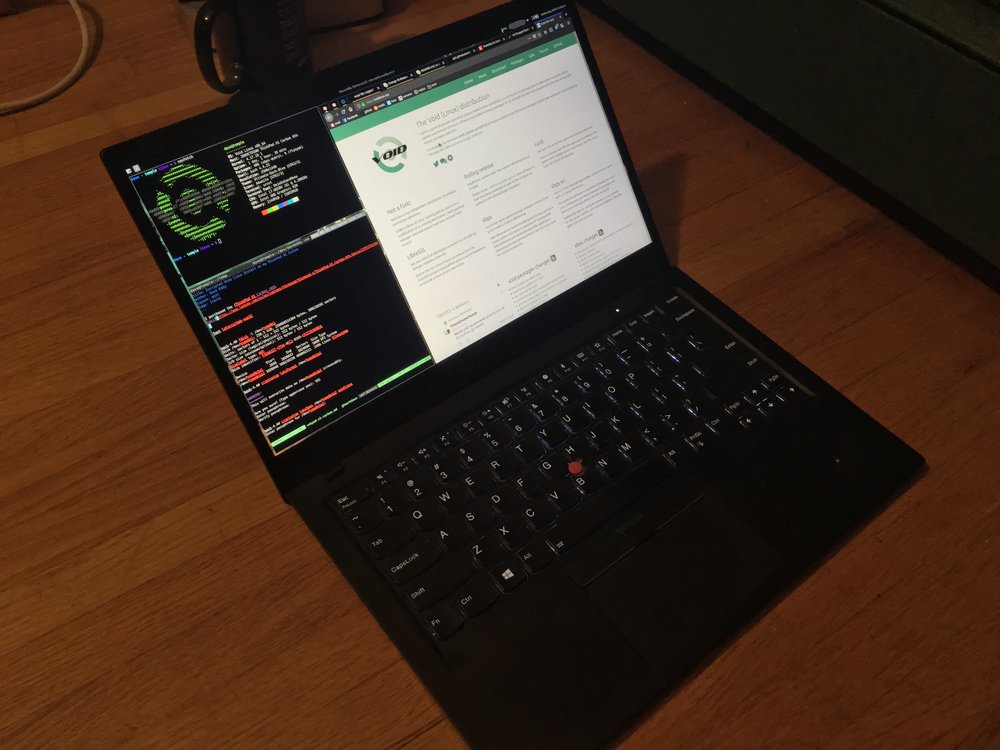
I purchased the ThinkPad X1 Carbon (6th Gen) laptop over a month ago and have been happily using Void Linux on it for the last couple of weeks or so. The battery on this thing is absolutely amazing - without any tuning specifically for the battery itself, I can get really great battery life.

I posted about my install on reddit and was asked specifically about the power usage. I said:

I keep firefox with ~15 tabs open and have a couple terminal windows open - that’s my daily workflow, and I can get like 8 full hours on this laptop! Sleeping however is a nightmare. It doesn’t support s3 out of the box and I have yet to try this patch to enable deep sleep - i’ll report back when I do. When the laptop is suspended it’ll last about 48 hours before it is completely dead (WHICH IS TERRIBLE).

However, my friend Mike showed me this tweet showing that the latest ThinkPad BIOS update added support for better sleeping on Linux! I really wanted better battery life when sleeping, so I jumped into trying to update it as fast as I possibly could - and in that process, I learned a lot and failed pretty hard at first. This is my journey into getting a good nights sleep on my ThinkPad with Linux.

Read More...


Encrypted Void Linux Install on my ThinkPad X1 Carbon

Posted by Dave Eddy on Sep 05 2018 - tags: tech

I purchased the ThinkPad X1 Carbon (6th Gen) laptop about a month ago and have been loving it. My friend Mike convinced me to get it after showing me how nice his was and how well Linux ran on it. I hadn’t run Linux on a laptop or a desktop since around 2010, as I had switched over to almost exclusively OS X.

I installed Manjaro when I got the laptop and used it for a couple of weeks just to get used to Linux again (and the i3 Window Manager). However, this was also my first experience with systemd, and, after using it for a bit, I really wanted something a whole lot simpler. Something that was designed to be lean, easy to understand, and easy to manage.

Enter Void Linux.

</img>

To install Void Linux, I basically copied the steps in this wiki page:

https://wiki.voidlinux.eu/Manual_install_w/full_disk_encryption

with the modifications at the bottom for EFI/UEFI machines.

Read More...


In Honor of Terry Davis and TempleOS

Posted by Dave Eddy on Sep 04 2018 - tags: tech

https://www.youtube.com/watch?v=oY33uoBSw3w

TempleOS is an engineering marvel and Terry A. Davis was an inspiration to a lot of people out there including myself. I made this cover as a way to honor him and his legacy and provide support for anybody out there who is dealing with this tragic loss.

This hymn is one of my personal favorites. It is commonly used as the introduction song for most videos by Terry about TempleOS - albeit it in a more MIDI like sound played directly by the PC speaker.

I made a more upbeat version of this song last year, though it wasn’t personally enjoyed by Terry himself.

https://www.youtube.com/watch?v=IdYMA6hY_74

RIP Terry


Block Tracking Sites With dnsmasq

Posted by Dave Eddy on Jul 19 2018 - tags: tech

Around five years ago I started looking into different ways to block ads and trackers in the most effective way on my computers. I discovered this hosts list on someonewhocares.org and even wrote a script to automate the process of downloading, verifying, and installing the list on my machines.

https://github.com/bahamas10/someonewhocares

I recently got back into it when I was setting up Encrypted DNS with dnsmasq and dnscrypt-proxy on SmartOS using OpenNIC. I stumbled across the Pi-hole project and really liked it, however I didn’t want to run a raspberry pi in my house as part of any critical infrastructure. Instead, I took the essence of that project and found a compiled blocklist to use with my existing dnsmasq setup to block these sites at the DNS level.

notracking

I found notracking/hosts-blocklists which is an automatically updating block list compiled from multiple sources compatible with dnsmasq. I created my own set of scripts to download the latest blocklists from GitHub, verify them, and install them for use with dnsmasq, and finally restart dnsmasq so it picks up the changes.

https://github.com/bahamas10/notracking

I installed this on my nameserver zones with:

Read More...


Nginx Return Remote IP Address

Posted by Dave Eddy on Jul 17 2018 - tags: tech

The nginx server that hosts this website can now return your current IP address if you hit the url /ip.

https://www.daveeddy.com/ip

I have an alias in my bashrc to quickly use this to get my current external IP.

$ type externalip
externalip is aliased to `curl -sS https://www.daveeddy.com/ip'
$ externalip
1.2.3.4

To set this up, I modified my nginx config to add a location section for /ip

I basically ripped off this stackoverflow post but modified it to only match the single URL.

location =/ip {
        default_type text/plain;
        return 200 "$remote_addr\n";
}

location / {
        root /var/www/daveeddy.com;
}

Encrypted DNS with dnsmasq and dnscrypt-proxy on SmartOS

Posted by Dave Eddy on Jul 07 2018 - tags: tech

For the last 3 years I have been using djbdns on SmartOS and it has all been working great. Recently however, I started looking into DNSSEC and DNSCrypt, which ended up leading me to the OpenNIC Project.

I decided to change my home DNS server setup to forward OpenNIC DNS servers over an encrypted channel as opposed to using OpenDNS like I did with djbdns.

To set this up, I have a zone with dnsmasq and dnscrypt-proxy running

  • dnsmasq - listens globally on port 53 for incoming DNS requests, answers local domain DNS requests for my network, and forwards the rest to dnscrypt-proxy
  • dnscrypt-proxy - listens locally on port 5300 for incoming DNS requests from dnsmasq and forwards them securely to an OpenNIC DNS server

Install

To start, install dnsmasq with the following command:

pkgin in dnsmasq

Installing dnscrypt-proxy requires a little bit more work as it is currently not in pkgsrc. To install it, we need to pull in some dependencies.

Read More...


OpenVPN Server Setup With Easy-RSA on SmartOS

Posted by Dave Eddy on Jul 05 2018 - tags: tech

At home I have a zone dedicated to running an OpenVPN server. With this I can connect to my home network securely on both my laptop and phone when I’m away.

I followed this guide for getting the zone ready to route properly for OpenVPN, and then used Easy-RSA to generate the certificates needed.

Zone Setup

To get started, make sure the zone is created with allow_ip_spoofing enabled on the NIC of the zone. I used a payload similar to this to create the vpn zone.

{
  "brand": "joyent",
  "image_uuid": "221635c4-3b85-11e8-b6ba-23f68c9bf2c4",
  "autoboot": true,
  "alias": "vpn",
  "hostname": "vpn.rapture.com",
  "dns_domain": "rapture.com",
  "resolvers": [
    "10.0.1.2",
    "10.0.1.3"
  ],
  "ram": 512,
  "nics": [
    {
      "nic_tag": "admin",
      "ip": "10.0.1.41",
      "allow_ip_spoofing": true,
      "netmask": "255.255.255.0",
      "gateway": "10.0.1.1",
      "primary": true
    }
  ]
}

Read More...


DHCPD New Lease Notifier

Posted by Dave Eddy on Apr 12 2018 - tags: tech

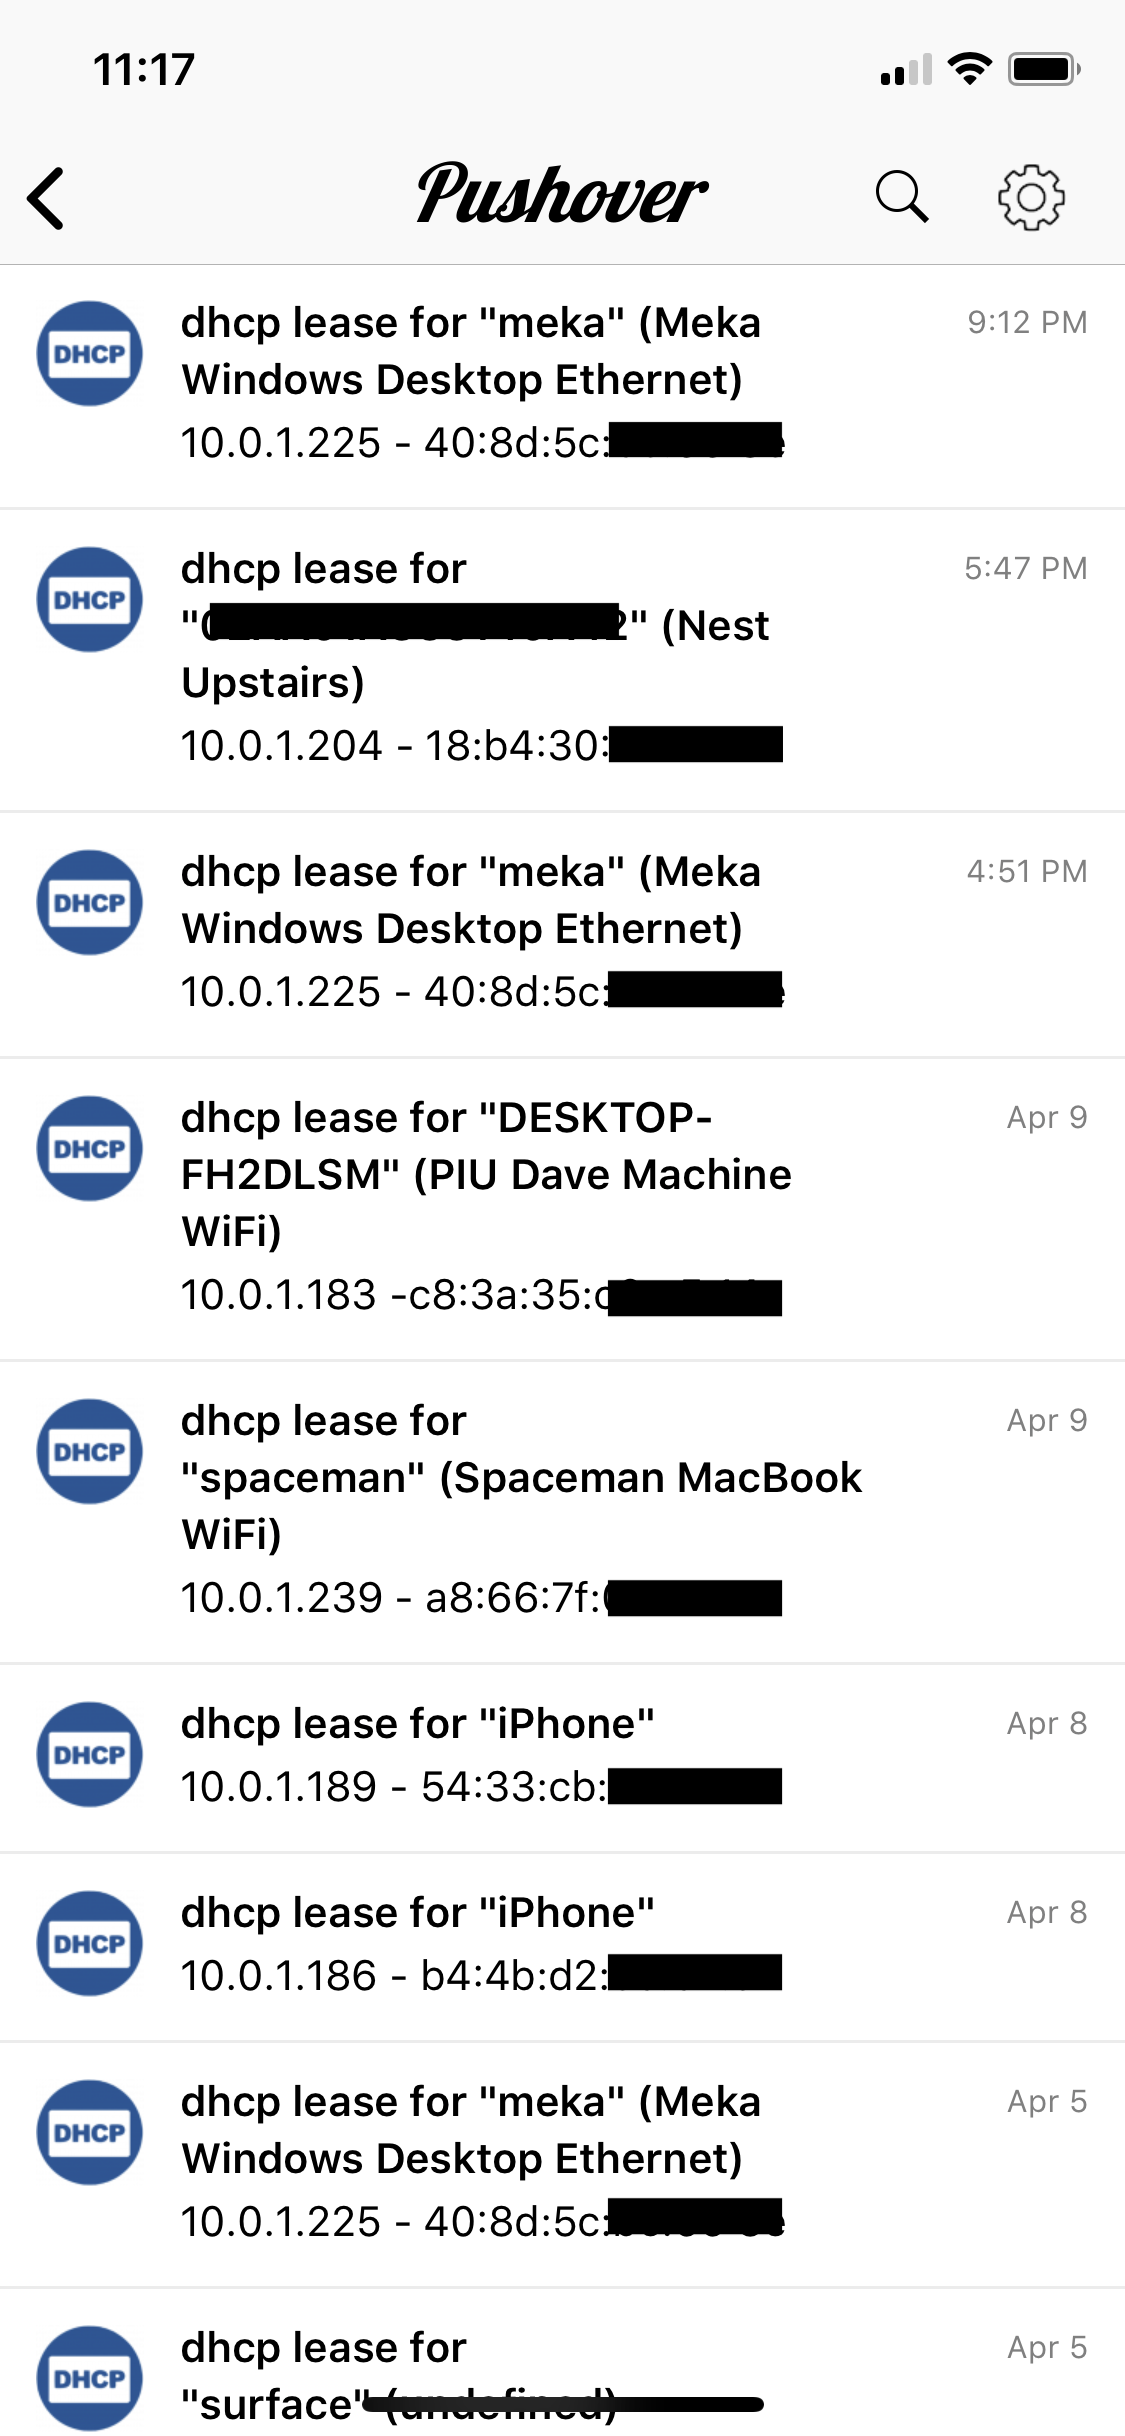
Three years ago I set up SmartOS as a Home Router which required creating a zone specifically for handling DHCP requests on my network. As part of wanting to have more visibility into my network, I wrote a program to notify me whenever a new DHCP lease was given out by the server.

https://github.com/bahamas10/node-dhcpd-notifier

dhcpd-pushover

Read More...


DIY Pump It Up Pad Platform With Bars

Posted by Dave Eddy on Mar 27 2018 - tags: diy

I first found Pump It Up in my freshmen year of high school - sometime between 2003 and 2004. I would go to Kahunaville at the Galleria Mall most weekends with my friend Ben, and then later with my other friend Jeremy to play as much as possible. It was a couple months later where I discovered DDR as well, and both of those dance games have just worked their way into the person I am today. That might be a little extreme, but even when I’d go a year or two without playing I’d always come back and play them even harder than I did before.

Around 2013 I discovered the Dave & Busters by my house had a Pump It Up machine and it had a lot of Kpop songs on it - that pulled me back in for a while. I’ve always thought it would be cool to own my own machine, but to find one used was proving to be very difficult, and buying new I was looking at upwards of $9,000… a lot more than I was looking to spend.

Towards the end of 2016 I pulled the trigger on some pads I had been eyeing up for a while - I bought 2x Precision Omega 5x Pads. I had setup a computer with a hacked up version of StepMania on it (skinned like PIU Prime) and it all worked. It wasn’t the best setup - I was lacking a bar for support, and the software would sometimes crash or the songs were horribly out of sync with each other.

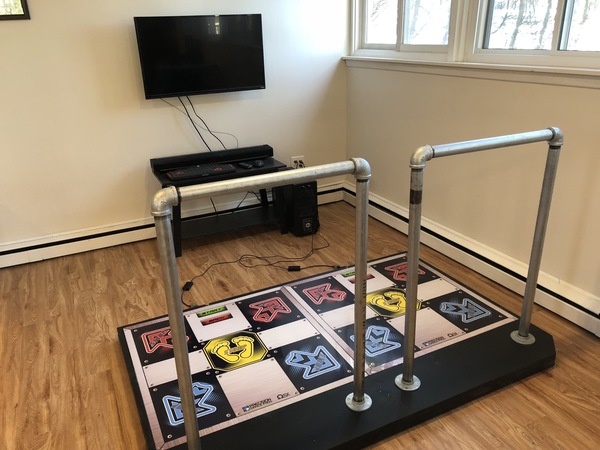
I got back into the game heavily a couple months ago in January thanks to the wonderful PIU Upstate Squad :D. After pushing myself hard on the machine and really increasing my skills, I decided it was time to create the machine properly. This meant getting the software working 100% (spoiler: I’m using StepF2 - It works great!) as well as an actual platform for the pads with real metal support bars to use.

Read More...


Wooden Countertop

Posted by Dave Eddy on Mar 18 2018 - tags: diy

I’ve been in the process of redoing my kitchen for over 2 years now. I’m going to dedicate an entire blog post to that whole process once it is finished (it’s getting close!) but for now, I have this post that’ll just go over the wooden countertop I built.

I’ve thought about building my own countertops for some time, but didn’t think I really had the skill, or was just overwhelmed by the idea of it. I was at Home Depot a while back with my parents when we were looking at different countertop options for my kitchen. I pretty much ended up either hating all of them, or being, at the very best, not enthused about others. The one countertop I liked the best was (of course) made out of wood, but came with a steep price tag of well in the thousands.

By building my own countertops out of 2x6’s I cut and assembled myself, I ended up being able to create and finish the countertop for just about $150.

Note: In this picture the kitchen isn’t completely finished. There is no backsplash behind the counter (I haven’t built it yet), no trim on or under the cabinets, and the pole going through the countertop is actually holding the house up - so I will be facing that in dark stained wood eventually like I did upstairs.

Read More...